Animal Caretaker Free Documentation
The documentation for your awesome theme or template
Introduction
- Theme Name : Animal Caretaker
- Author : mishkatwp
- Support Forum : https://wordpress.org/support/theme/animal-caretakert/
- License : GNU General Public License v3 or later
- Discription :The Free Animal WordPress Theme is a versatile and user-friendly website template designed to cater to the diverse needs of individuals and organizations involved in animal-related activities. This theme offers an invaluable platform for a wide range of users, including animal shelters, veterinarians, pet sitters, animal welfare advocates, and even animal lovers looking to create an online presence dedicated to our furry, feathered, or scaly companions. The theme serves as an all-in-one solution, making it accessible and effective for users with varying levels of technical expertise. Its primary function is to provide a polished and professional online platform for showcasing all things related to animals. In terms of appearance, the Free Animal WordPress Theme boasts a modern and inviting design that reflects a warm and compassionate approach to animal welfare. The clean and responsive layout ensures that your website looks excellent on any device, from desktop computers to smartphones. One of the most significant benefits of this theme is that it’s entirely free, which is particularly advantageous for non-profit animal shelters, small pet businesses, and individuals passionate about animal welfare.
Establishing the Theme
Configure Theme
You can also install your theme through the WP Admin interface
To begin, access your WordPress admin area by logging in. Once logged in, navigate to the desired task by clicking on...
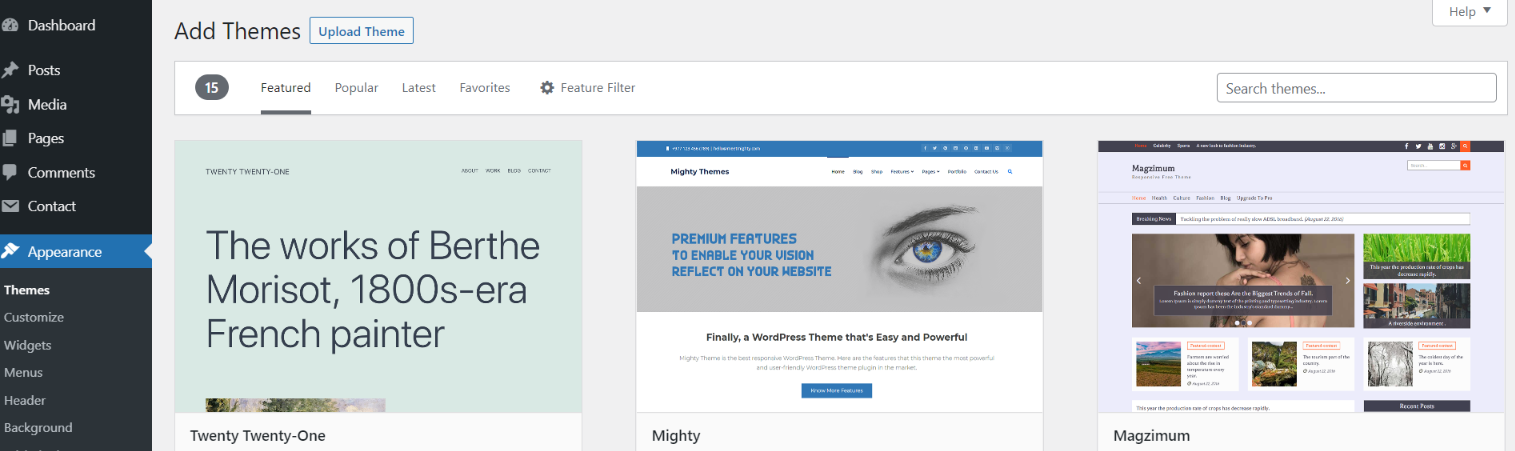
1. In dashboard click on Appearance >> Themes

2. Once the page has finished loading, direct your attention to the top of the themes page. Locate the prominent "Add New" button and proceed to click on it. This action will initiate the process of adding a new theme to your WordPress site.
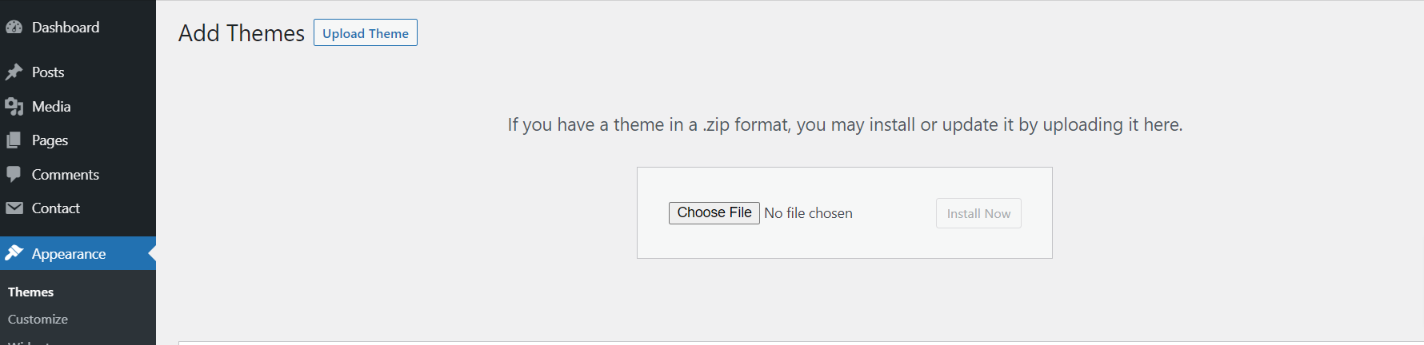
3. Click on the button labeled as 'Upload Theme'.
Select the "animal-caretakert.zip" theme from Browse button, and after that select "Install Now."
5. After successfully installing your theme, WordPress will display success message and a link to activate or view a live preview of it. You've done a great job installing your theme!
Configure Home Page
The options of this page template (like sections location, disabling sections, number of posts they display) can be controlled it.
To design a home page, follow these steps.
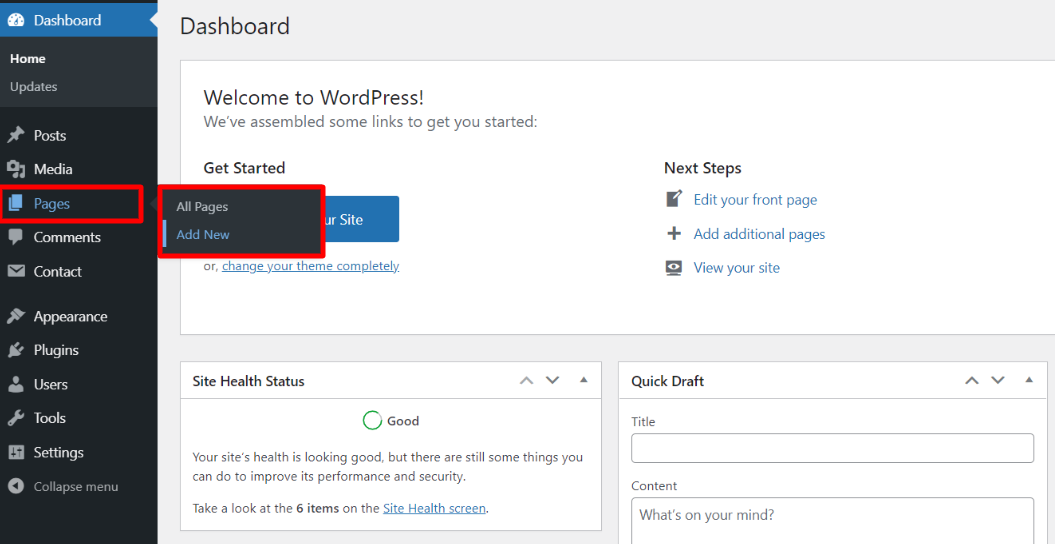
1. Make a page to set the template: visit Dashboard Pages -- Add New Page
Name it "home" or anything as you like. Then, from the template dropdown, pick "front page template".
The Page Attributes section provides your page a parent page and a template.
1. Make a page to set the template: Go to Dashboard Pages -- Add New Page

Design front page as follows: Visit Setting -- Reading -- To set the home page as a static page for your website

All of the demo content will be visible on top page once you're done.
Essential Plugins
When you initially activate the theme, you'll be asked to install these plugins on your Dashboard. You can ignore the message if you don't want to install these plugins on theme activation, and if you change your mind later, you can install them manually.
In the Dashboard, click on Plugins >> Install Plugins.
Kirki
Plugin download link kirki
WooCommerce
Plugin download link WooCommerce
Configure Menu
Configure Menu
In the dashboard, visit Appearance >> Menu
To access the Menu Editor, visit the Dashboard and click on the 'Appearance' menu on the left-hand side. From there, select the 'Menus' option.
To create a new menu, follow these steps:At the top of the page, select "Create a new menu".Enter a name for your new menu in the "Menu Name" box.Click on the "Create Menu" button.
Your new custom menu has been successfully created.
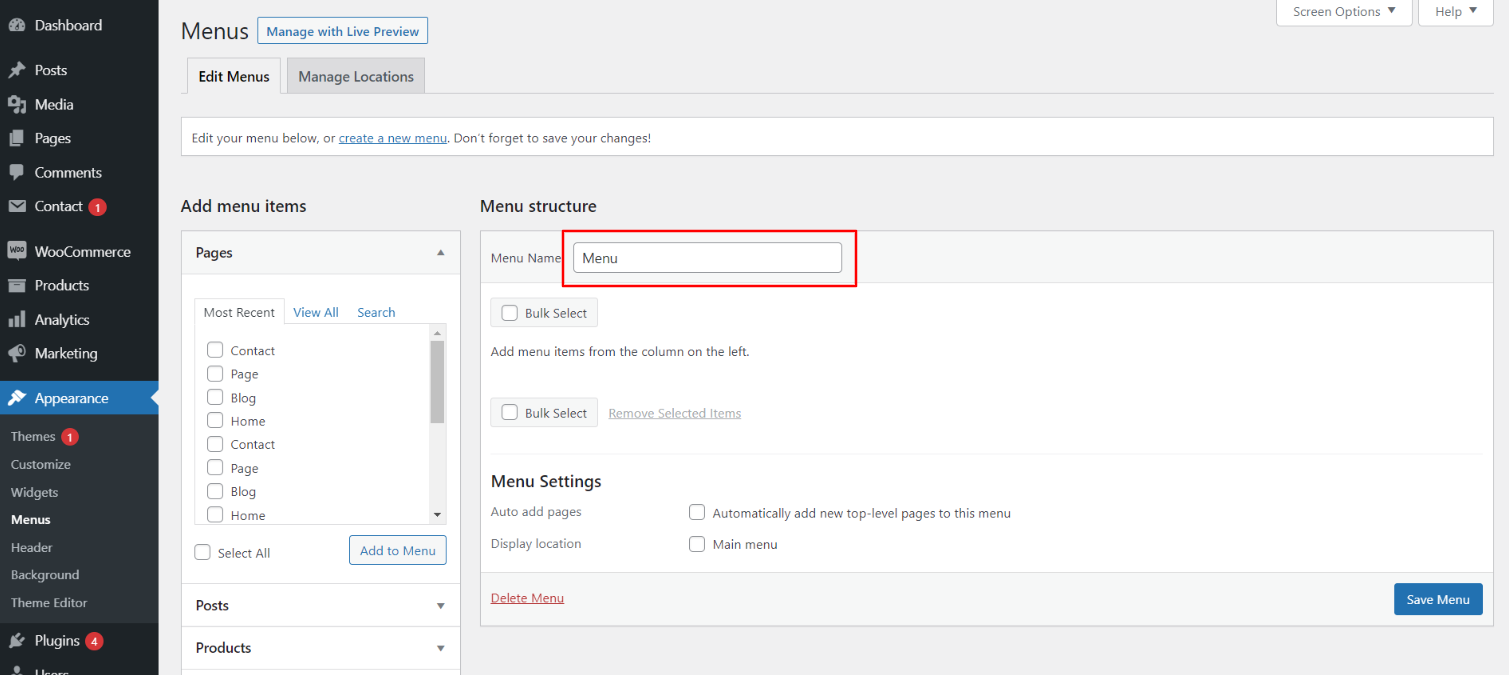
To add items to your menu
In the Menu Editor, locate the section labeled "Pages"
Click the checkbox next to each page's title that you want to add.
Once you have selected the desired pages, click the "Add to Menu" button.
Custom menu has been successfully saved

On the front end, the menu will appear as follows.

Animal Caretaker Theme Configure
Logo Configure
Proceed with Theme Logo setup, you can set site title and tagline, proceed as described below.
In the dashboard, visit Appearance -- Customize -- Site Identity -- Set Title and Tagline You can also make the tagline hidden.
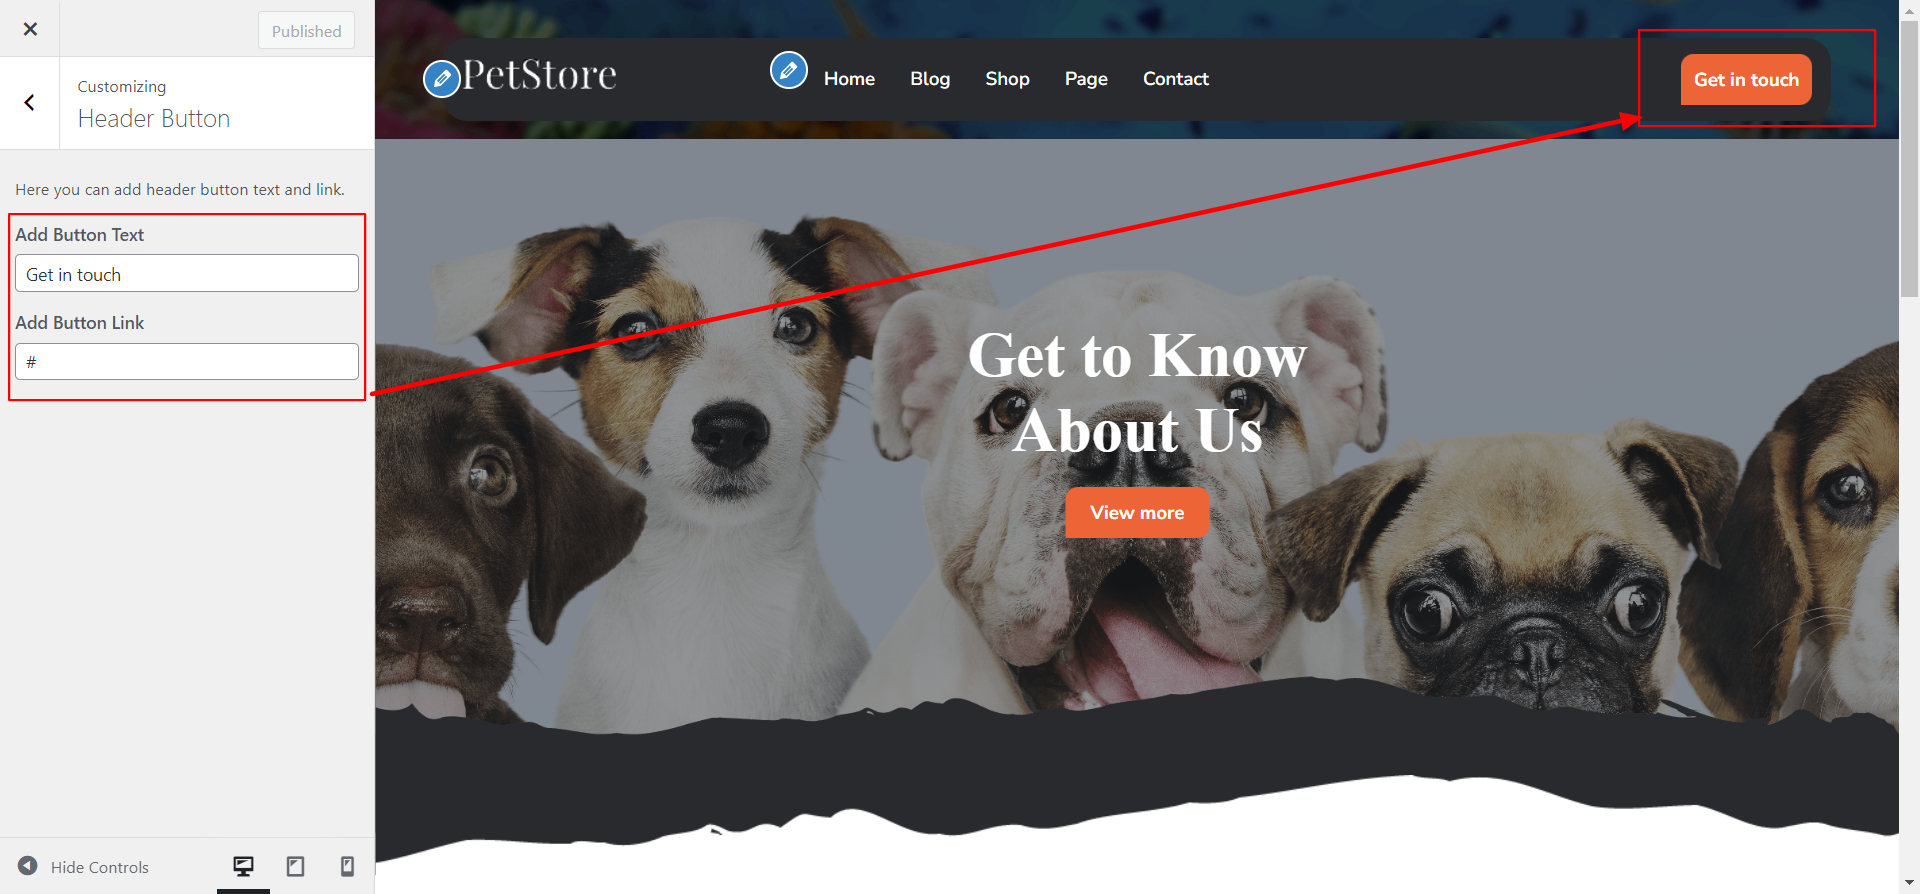
Header Button
Proceed with Header Button, so proceed as described below.
In the dashboard, visit Appearance -- Customize -- Header Button
You can set Header Button. You can button text and button url.
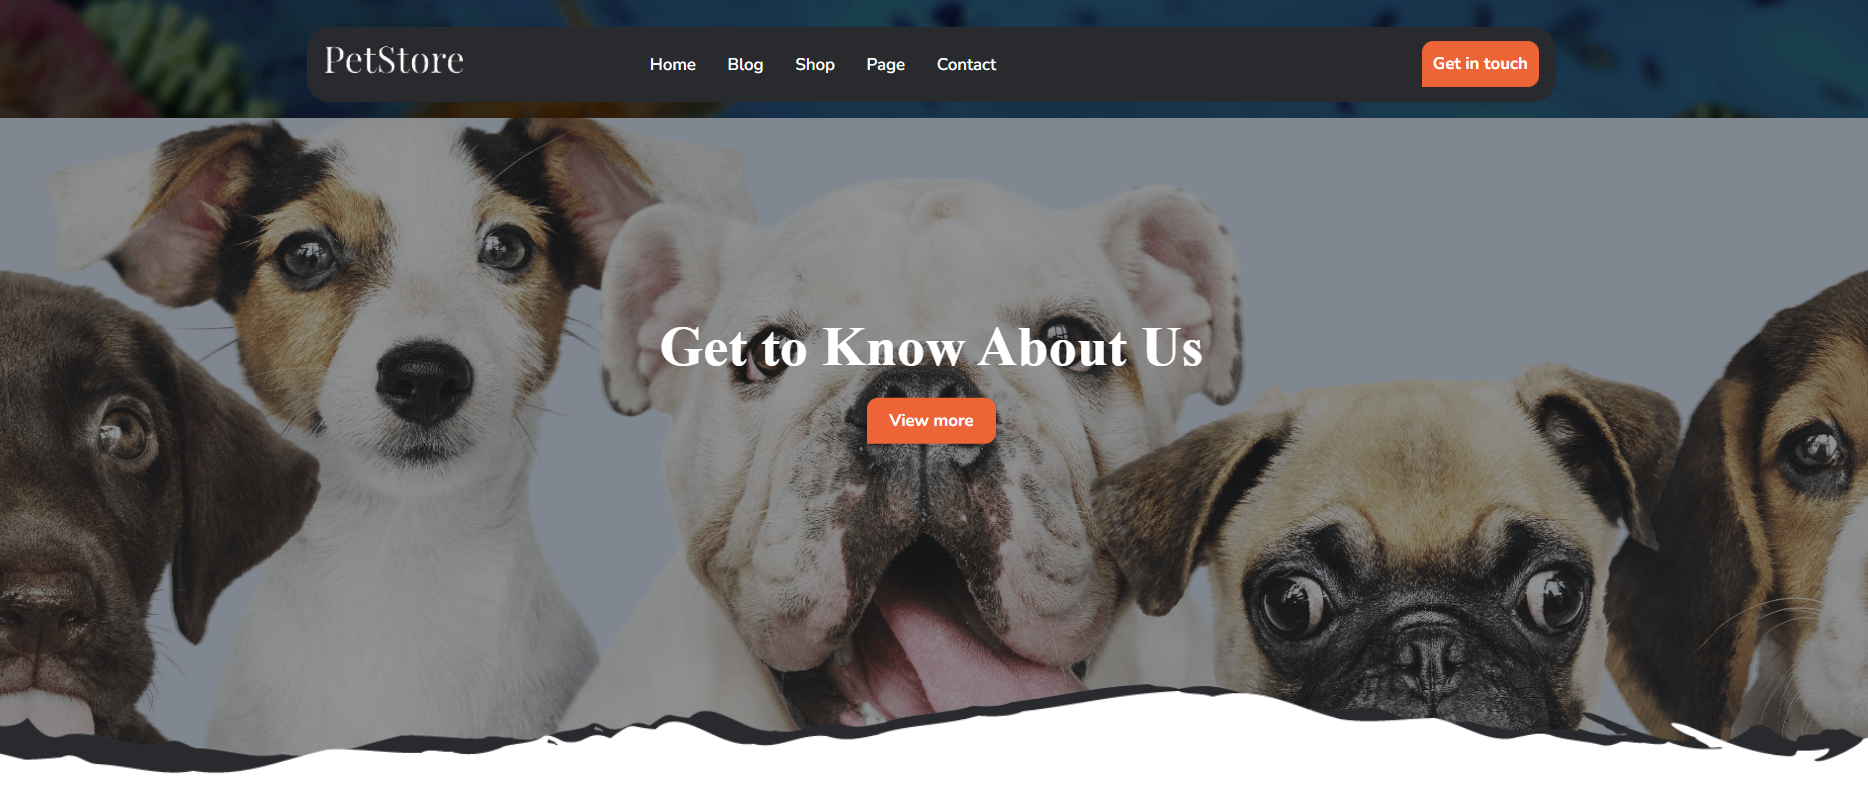
On the front end, the appearance will resemble the following.

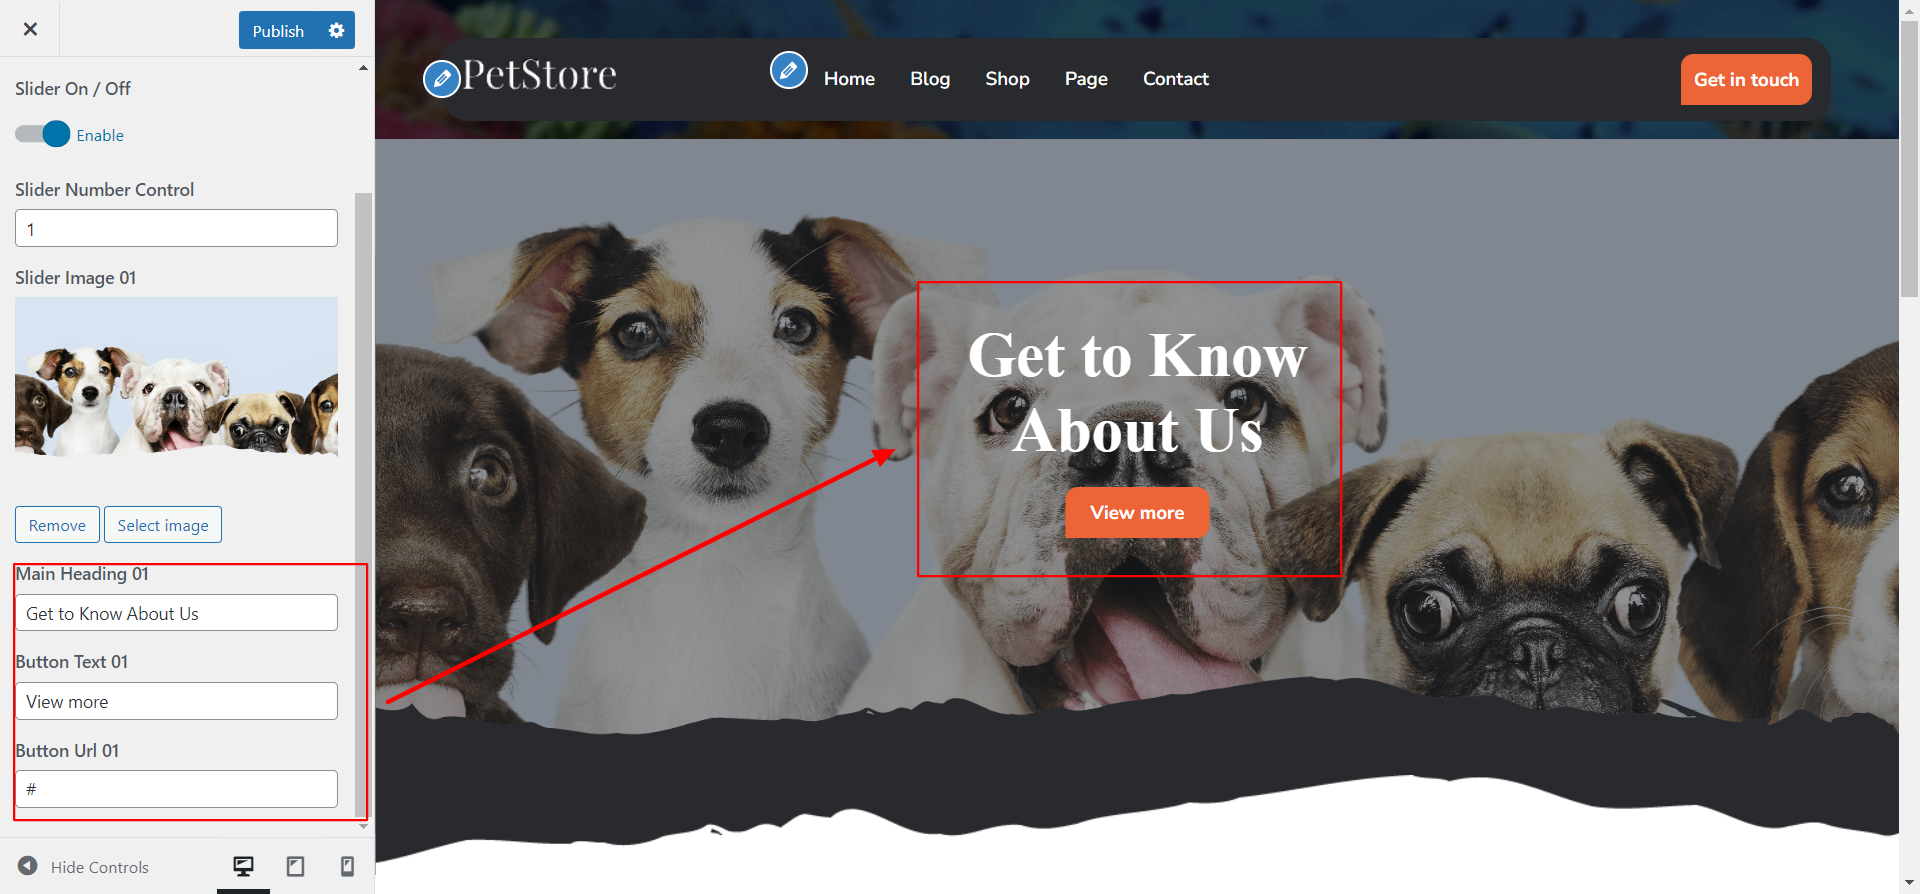
Slider Section
Proceed with Theme Slider Settings , you can set slide show , proceed as described below.
In the dashboard, visit Appearance -- Customize -- Home Slider
Select number slides to show, then select image for the slide
Set all the details which is required for slider
On the front end, the appearance will resemble the following.
Featured Products Section
Featured Products Settings
Fetch Categories
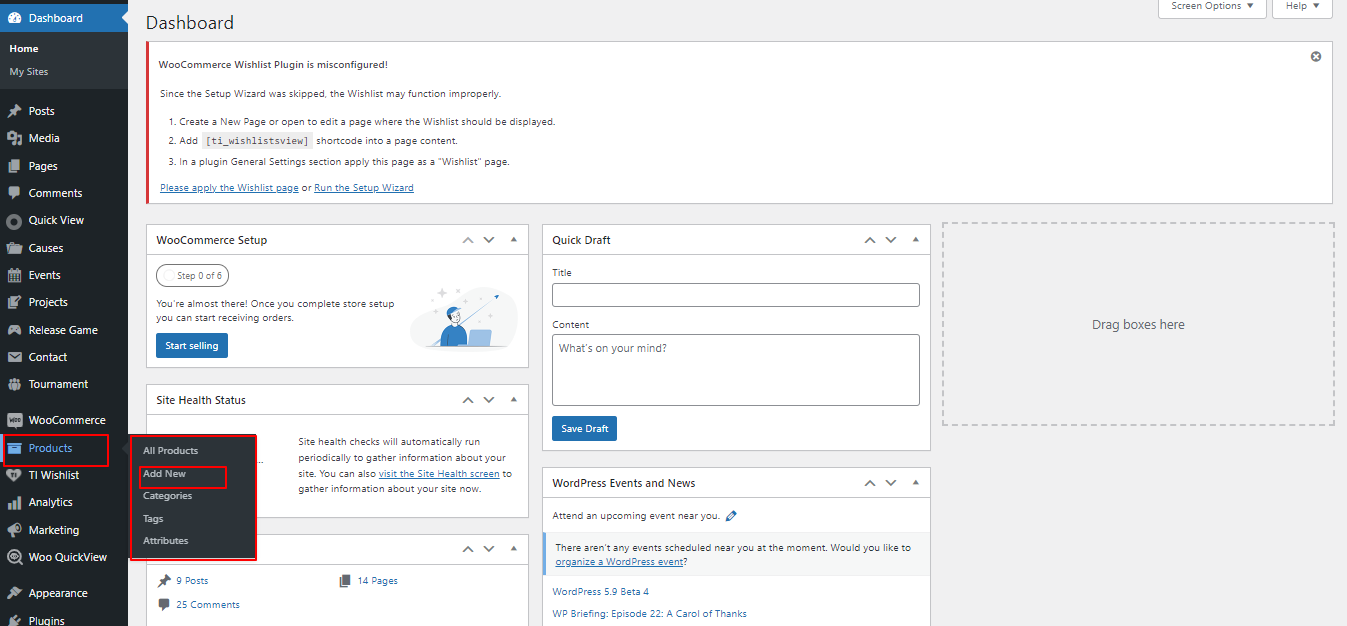
Important Step: Install WooCommerce plugin in your wordpress.
In the Dashboard, go to Products >> Categories >> Add New
This screen is divided into 2 sections, the Add New Category and category table sections.
All of the categories are listed in this table. Categories are organized alphabetically and hierarchically.
Follow the instructions given below to setup Category Settings.
Once you have done with this you will see the categories on your theme customize.

In this section, you have to add new category for each product.
Fetch Products
In the Dashboard, go to Products >> Add New
In order to proceed with Products Settings, You can set product titel, product description, price and image. And select which category you want this product to show.
Follow the instructions given below to setup product settings.
In the Dashboard, go to Products >> Add New
You can make multiple latest products for category.

In order to proceed with Featured Products Settings follow the instructions given below.
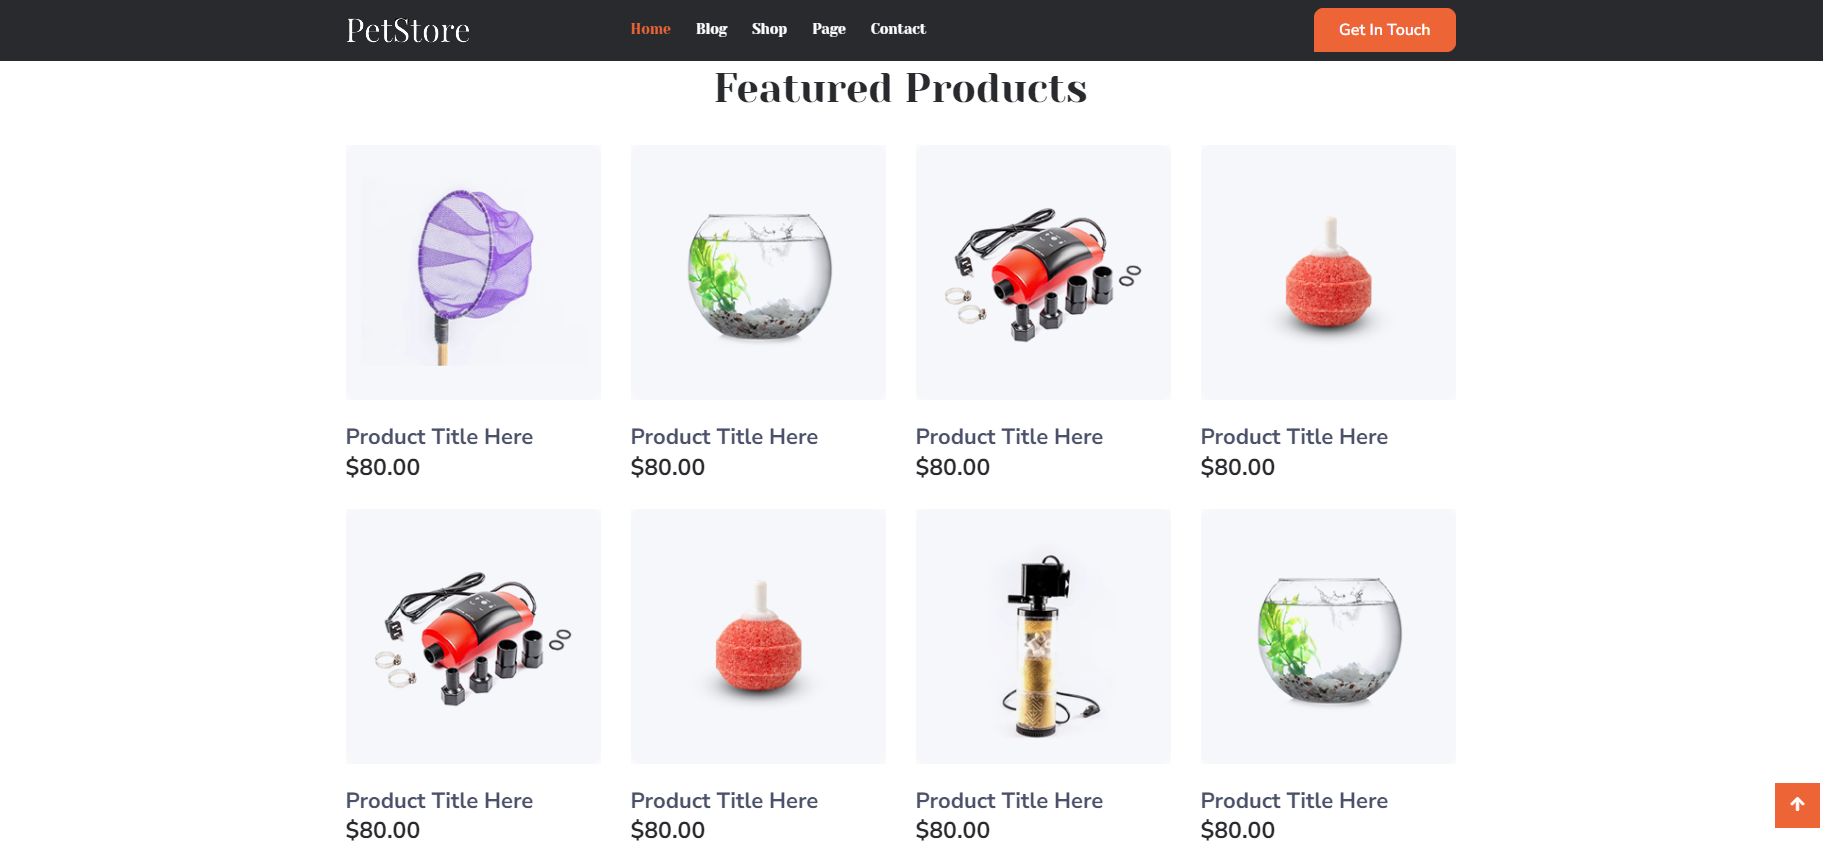
In the Dashboard, go to Appearance >> Customize >> Theme Options >> Featured Products Settings
You can set heading and sub heading for section. You can choose from this options for each featured products settings.
You can select number of tabs to show in section. You can select text of tab. You can select category to display product choose from this options for each featured products settings.

In front end, it will look like this.
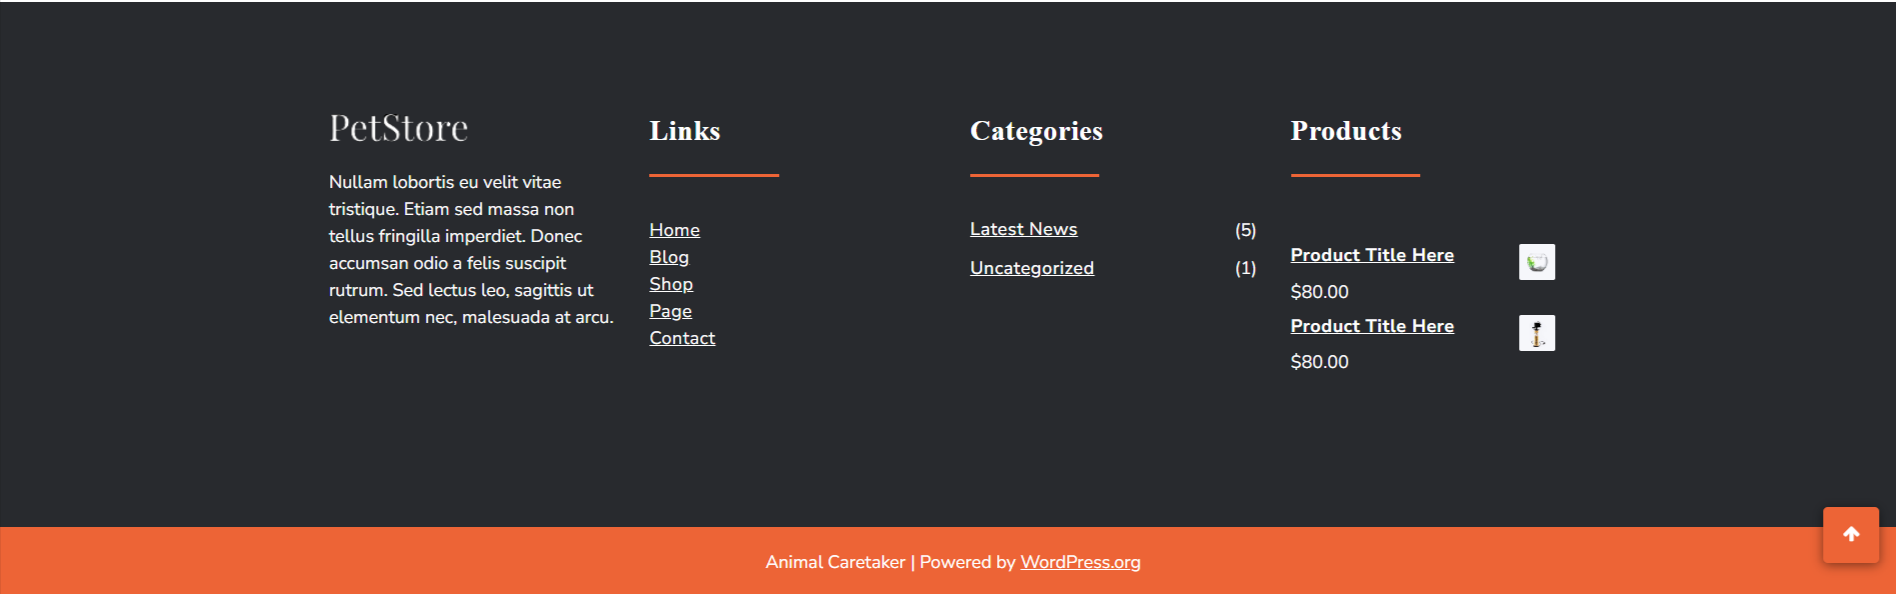
Configure Footer Section
There are four columns in the footer. Any widget can be added there.
1. In the dashboard, visit Appearance -- Widgets
To add widgets to the footer, see the screenshot below.

You can add footer coloumns, for that you need to select widgets like text, image, gallery, etc which allows you to add text or image as per your choice with ease.
Proceed with manage content for footer and add some widgets, navigate to, proceed as described below.
2. In the dashboard, visit Appearance -- Widgets -- Footer Sidebar

Your footer will appear like this once you have added widgets to it.
Footer Copyright Text
Proceed with footer Settings, You can fill the copyright content to footer copyright Settings.
5. In the dashboard, visit Appearance -- Customize -- Footer

On the front end, the appearance will resemble the following.